Helpdesk How-To

Project Details
This is an example of the kind of instructions I have written over the years, in this case guiding staff in a communications unit in the use of a ticketing system in which communications staff would respond to work requests from internal customers. They would need to know how to:
- Log in
- Manage their workspace within the ticketing system
- Assign, update, and close tickets
- Move tickets as needed from one workspace to another
The instructions below have been obfuscated—some images and text deleted, others altered—to preserve the security of the entity for which they were written.
Sample Text
Footprints Starter Kit for the Communications Helpdesk
Logging In
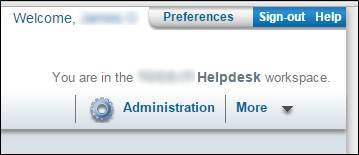
Follow the Footprints link above [removed] and use the login credentials you were given. You should be taken to your Footprints homepage for the Communications workspace. If you belong to multiple workspaces you can change workspaces using the dropdown hidden behind the “You are in the [Workspace Name] workspace” text in the upper right corner of the page.
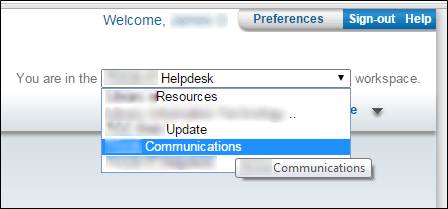
Clicking on the workspace name will reveal the dropdown from which you can chose a different workspace.
Your Homepage
The homepage currently is set to default to the “My Assignments and Requests” list:
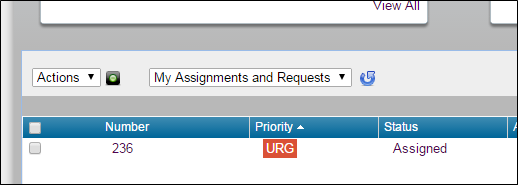
You can use its dropdown to find other lists, including the one for “Communications Assignments” as well as for “My Assignments” and “Requests” individually:
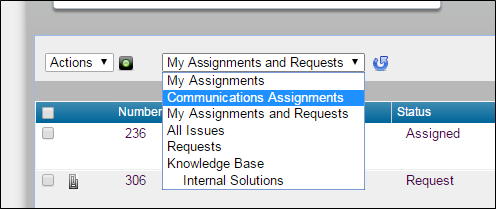
“My Assignments” means what it says – my assignments, not anyone else’s, so the homepage will look different for each of us as requests get assigned. The only items we’ll all see will be unassigned requests, and if you don’t have any assigned tickets then all you’ll see are unassigned requests, and if there aren’t any of those either then you’ll see nothing (except a message that says “You do not have any Issues assigned to you, and there are no Requests”).
There is a hierarchy of display for tickets, in this order:
- Priority
- “Urgent”
- “High”
- “Medium”
- “Low”
- “Lowest”
- Status; within each of the above priorities, tickets will appear in this order:
- “My Assignments”: i.e. tickets on which you appear; within these, tickets with the status of:
- “Open”
- “Assigned”*
- “Request” tickets, i.e. ones on which no one appears
- “My Assignments”: i.e. tickets on which you appear; within these, tickets with the status of:
[*There are other statuses present – “Accepted” and “Replied to Requester” being the others, in addition to “Completed” – and many more which could be created, but these are the ones most likely to be used for assigned tickets.]
The Life of a Ticket
Some of the terminology already used may be clarified by elucidating the life of a ticket from creation to closure.
- When a user fills out the front-end form, submitting that form sends an email to the Footprints workspace configured to receive messages at that address, in this case the Communications workspace. The fields of the front-end form correspond to fields in the workspace’s form, and the email transfers each field’s data from the front-end form to the back-end Footprints form for each ticket created when Footprints consumes an email sent to it.
- When a ticket is created, Footprints sends a notification email to each agent selected to receive email when a ticket is created (in Footprints’ terminology, an agent is a “standard, full-strength user” with an account in the system) and gives the ticket a status of Request. At this point it will show up on the “Requests” and “My Assignments and Requests” lists.

- Next, the ticket is assigned. Agents can self-assign tickets or assign them to other agents.
- Change the status of the ticket to “Assigned.”
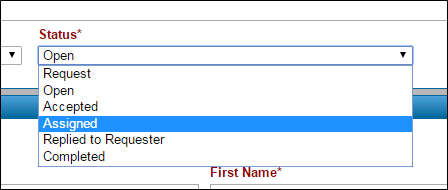
Ticket status
Note: As soon as you first interact with a ticket, Footprints automatically changes its status from Request to Open. Opening the ticket in Footprints and then saving it* certainly will do this, but even responding to the notification email will do so – automatically (amendments to tickets made via email auto-save the ticket). This is fine, but don’t forget about a new request to which you’ve responded by email because in Footprints it then will be found only in the “Open” list, having disappeared from the “Requests” and “My Assignments and Requests” lists, and (unless someone else checks the “Open” list) you now are the only person who will know where it is because now it won’t appear on anyone’s homepages, including yours. Assuming you assign it to yourself and/or someone else, it then will appear on the homepage(s) in question.
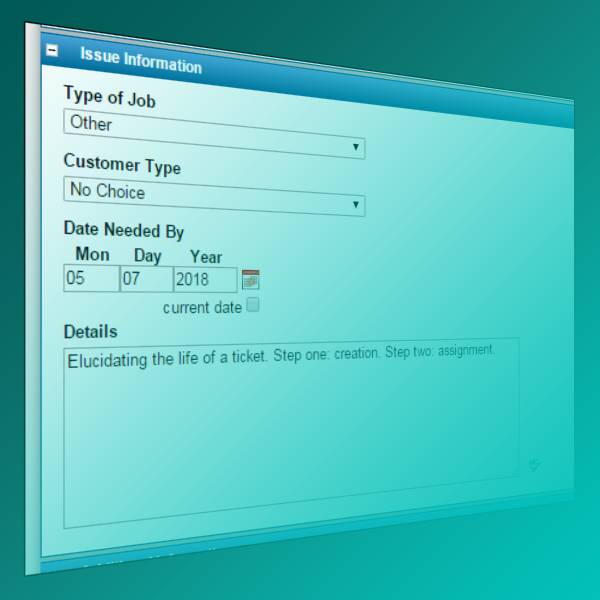
[*If you open a new ticket in Footprints you will see it has a status of Open, but if you close it without saving you will notice nothing has changed: it still appears in the Request list(s) with a status of Request. This is the only “escape hatch” where this is concerned.] - Review the fields under Issue Information; this is where you’ll find details of the request input by the user, including Type of Job, Date Needed By, and the Details text field, along with any other field(s) appropriate to the job type. [Customer Type is only there for purposes of form logic – it is not directly selected by users and you do not need to work with them regarding it.]
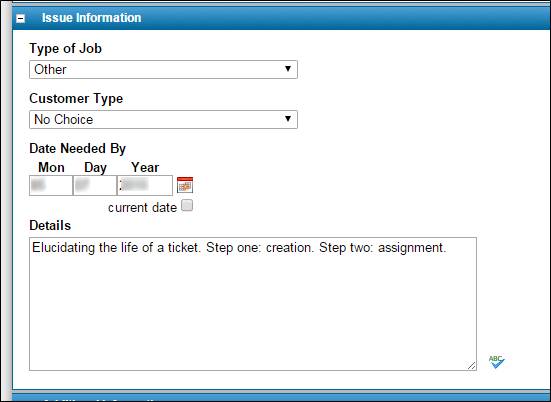
Issue information - Additional Information has a text area in which you can compose a response to the user. Also, you can use the View Complete Additional Information link to review all correspondence stored with the ticket.

Additional information - The Attachments area is where you’ll find files sent by the user to help explain the request.
- Finally, the Assigned Personnel and Notifications area is where you will do the actual assignment of the ticket. Notice that your name already appears under Assigned Personnel; this is because you are an agent in the system and, just by looking at the ticket, your name has auto-populated this field. [As with the status field, if you were to close without saving this would not be retained and the ticket would still show “Not Assigned” in the Request list(s).]
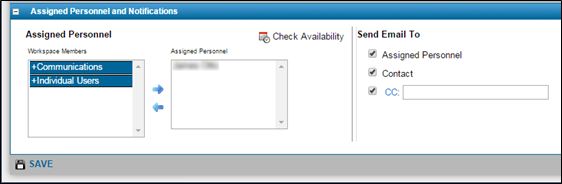
Assigned personnel and notifications
You could just click Save and be done. However, in order for this ticket to show up on the “Communications Assignments” list where other team members can see it, you will need to do the following:- Highlight your name under Assigned Personnel and use the left arrow to move it out.
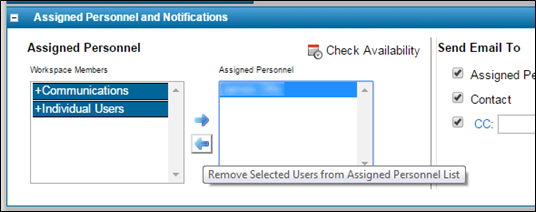
Remove selected users - Open the Communications group under Workspace Members. Highlight your name and, if necessary, the name(s) of anyone who needs to be on the ticket as well, and use the right arrow.
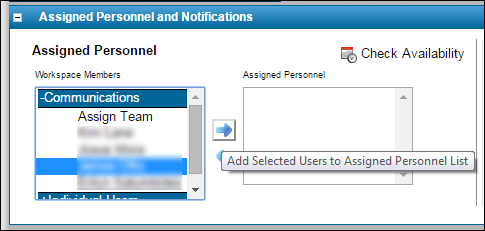
Add selected users - Your name as well as the Communications team now appear under Assigned Personnel.
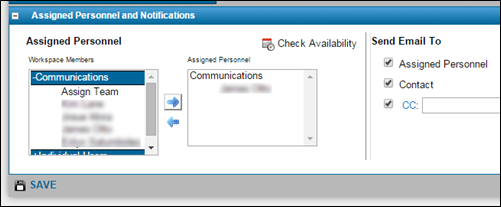
Assigned personnel
Add any CCs if needed and Save.
- Highlight your name under Assigned Personnel and use the left arrow to move it out.
- Change the status of the ticket to “Assigned.”
- Ticket is being worked. Communicate to the requester via the ticket or use the ticket as an initial handshake, communicating by whatever means appropriate and using the ticket to document your work, or a combination of both. Any text you add to the Additional Information text area will be sent to the user (“Contact”), to you and another other assigned personnel, and to any CCs in the form of an email once the ticket is saved again.
- Close the ticket once all parts of the request are done by changing the status to Completed.
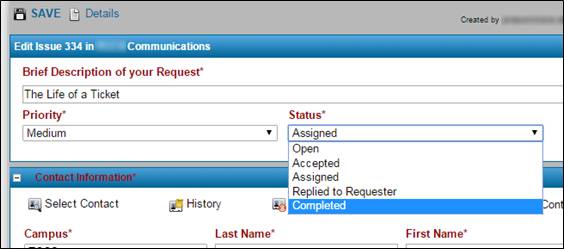
Marking a ticket “Completed” - Save.
Sample Text
Footprints Starter Kit for the Communications Helpdesk
Logging In
Follow the Footprints link above [removed] and use the login credentials you were given. You should be taken to your Footprints homepage for the Communications workspace. If you belong to multiple workspaces you can change workspaces using the dropdown hidden behind the “You are in the [Workspace Name] workspace” text in the upper right corner of the page.
Clicking on the workspace name will reveal the dropdown from which you can chose a different workspace.
Your Homepage
The homepage currently is set to default to the “My Assignments and Requests” list:
You can use its dropdown to find other lists, including the one for “Communications Assignments” as well as for “My Assignments” and “Requests” individually:
“My Assignments” means what it says – my assignments, not anyone else’s, so the homepage will look different for each of us as requests get assigned. The only items we’ll all see will be unassigned requests, and if you don’t have any assigned tickets then all you’ll see are unassigned requests, and if there aren’t any of those either then you’ll see nothing (except a message that says “You do not have any Issues assigned to you, and there are no Requests”).
There is a hierarchy of display for tickets, in this order:
- Priority
- “Urgent”
- “High”
- “Medium”
- “Low”
- “Lowest”
- Status; within each of the above priorities, tickets will appear in this order:
- “My Assignments”: i.e. tickets on which you appear; within these, tickets with the status of:
- “Open”
- “Assigned”*
- “Request” tickets, i.e. ones on which no one appears
- “My Assignments”: i.e. tickets on which you appear; within these, tickets with the status of:
[*There are other statuses present – “Accepted” and “Replied to Requester” being the others, in addition to “Completed” – and many more which could be created, but these are the ones most likely to be used for assigned tickets.]
The Life of a Ticket
Some of the terminology already used may be clarified by elucidating the life of a ticket from creation to closure.
- When a user fills out the front-end form, submitting that form sends an email to the Footprints workspace configured to receive messages at that address, in this case the Communications workspace. The fields of the front-end form correspond to fields in the workspace’s form, and the email transfers each field’s data from the front-end form to the back-end Footprints form for each ticket created when Footprints consumes an email sent to it.
- When a ticket is created, Footprints sends a notification email to each agent selected to receive email when a ticket is created (in Footprints’ terminology, an agent is a “standard, full-strength user” with an account in the system) and gives the ticket a status of Request. At this point it will show up on the “Requests” and “My Assignments and Requests” lists.
- Next, the ticket is assigned. Agents can self-assign tickets or assign them to other agents.
- Change the status of the ticket to “Assigned.”
Ticket status
Note: As soon as you first interact with a ticket, Footprints automatically changes its status from Request to Open. Opening the ticket in Footprints and then saving it* certainly will do this, but even responding to the notification email will do so – automatically (amendments to tickets made via email auto-save the ticket). This is fine, but don’t forget about a new request to which you’ve responded by email because in Footprints it then will be found only in the “Open” list, having disappeared from the “Requests” and “My Assignments and Requests” lists, and (unless someone else checks the “Open” list) you now are the only person who will know where it is because now it won’t appear on anyone’s homepages, including yours. Assuming you assign it to yourself and/or someone else, it then will appear on the homepage(s) in question.
[*If you open a new ticket in Footprints you will see it has a status of Open, but if you close it without saving you will notice nothing has changed: it still appears in the Request list(s) with a status of Request. This is the only “escape hatch” where this is concerned.] - Review the fields under Issue Information; this is where you’ll find details of the request input by the user, including Type of Job, Date Needed By, and the Details text field, along with any other field(s) appropriate to the job type. [Customer Type is only there for purposes of form logic – it is not directly selected by users and you do not need to work with them regarding it.]
Issue information - Additional Information has a text area in which you can compose a response to the user. Also, you can use the View Complete Additional Information link to review all correspondence stored with the ticket.
Additional information - The Attachments area is where you’ll find files sent by the user to help explain the request.
- Finally, the Assigned Personnel and Notifications area is where you will do the actual assignment of the ticket. Notice that your name already appears under Assigned Personnel; this is because you are an agent in the system and, just by looking at the ticket, your name has auto-populated this field. [As with the status field, if you were to close without saving this would not be retained and the ticket would still show “Not Assigned” in the Request list(s).]
Assigned personnel and notifications
You could just click Save and be done. However, in order for this ticket to show up on the “Communications Assignments” list where other team members can see it, you will need to do the following:- Highlight your name under Assigned Personnel and use the left arrow to move it out.
Remove selected users - Open the Communications group under Workspace Members. Highlight your name and, if necessary, the name(s) of anyone who needs to be on the ticket as well, and use the right arrow.
Add selected users - Your name as well as the Communications team now appear under Assigned Personnel.
Assigned personnel
Add any CCs if needed and Save.
- Highlight your name under Assigned Personnel and use the left arrow to move it out.
- Change the status of the ticket to “Assigned.”
- Ticket is being worked. Communicate to the requester via the ticket or use the ticket as an initial handshake, communicating by whatever means appropriate and using the ticket to document your work, or a combination of both. Any text you add to the Additional Information text area will be sent to the user (“Contact”), to you and another other assigned personnel, and to any CCs in the form of an email once the ticket is saved again.
- Close the ticket once all parts of the request are done by changing the status to Completed.
Marking a ticket “Completed” - Save.